
Solr 中导入并索引mysql数据
我们在solr中新建一个 collection来做导入mysql数据:
1、下载mysql-conncector.jar 用来 solr 连接mysql库
下载地址:
http://dev.mysql.com/downloads/connector/j/
http://dev.mysql.com/get/Downloads/Connector-J/mysql-connector-java-5.1.39.tar.gz
下载完毕,将mysql-connector-java-5.1.39-bin.jar拷贝的如下地方:
mkdir /usr/local/solr-6.1.0/dist/usr/
cp mysql-connector-java-5.1.39-bin.jar  /usr/local/solr-6.1.0/dist/usr/
2、建立新的collection
mkdir /usr/local/solr-6.1.0/server/solr/test_db/conf -p
cp /usr/local/solr-6.1.0/example/example-DIH/solr/db/conf/admin-extra.* test_db/conf/ -rf
3、配置文件修改
修改 conf/solrconfig.xml 添加 lib,以及需要mysql的配置信息
cd /usr/local/solr-6.1.0/server/solr/test_db/conf
vim solrconfig.xml

## 找到<lib dir=" 后 添加以下两个lib
<lib dir="${solr.install.dir:../../../..}/dist/" regex="solr-data
importhandler.*\.jar" />
<lib dir="${solr.install.dir:../../../..}/dist/usr/" regex=".*\.jar" />

##  在<requestHandler name="/select" class="solr.SearchHandler">前添加
<requestHandler name="/dataimport" class="org.apache.solr.handler.dataimport.DataImportHandler">
      <lst name="defaults">
         <str name="config">data-config.xml</str>
      </lst>
</requestHandler>
因为以上配置指定数据库的配置在 data-config.xml,接下来新建并编辑:
vim data-config.xml
<?xml version="1.0" encoding="UTF-8"?>
<dataConfig>
    <dataSource name="source1" type="JdbcDataSource" driver="com.mysql.jdbc.Driver" url="jdbc:mysql://localhost:3306/test" user="root" password="" batchSize="-1" />
  <document>
        <entity name="product" pk="id"  dataSource="source1"
                query="select * from product"
                deltaImportQuery="select * from product where id='${dih.delta.id}'"
                deltaQuery="select id from product where id> '${dih.delta.id}'">
         <field column="id" name="id" />
         <field column="brand" name="brand" />
         <field column="network" name="network" />
         <field column="size" name="size" />
         <field column="sys" name="sys" />
         <field column="ram" name="ram" />
         <field column="price" name="price" />
         <field column="hhd" name="hhd" />
         <field column="battery" name="battery" />
         <field column="pixel" name="pixel" />
     </entity>
  </document>
</dataConfig>
解释下上面的配置
dataSource:配置mysql的连接信息,及数据库,账号,密码等
entity name="product" :  mysql中数据表名
query="select * from product":数据库中选择数据
field column="id" name="id": 表中 id 列 对应 name
deltaImportQuery: 增量插入数据
deltaQuery:增量的数据的id给deltaImportQuery使用
最后编辑managed-schema
vim managed-schema

    <field name="id" type="string" indexed="true" stored="true" required="true" multiValued="false" />

    <field name="brand" type="string" indexed="true" stored="false" />
    <field name="network" type="string" indexed="true" stored="false" />
    <field name="size" type="string" indexed="true" stored="false" />
    <field name="sys" type="string" indexed="true" stored="false" />
    <field name="ram" type="string" indexed="true" stored="false" />
    <field name="price" type="string" indexed="true" stored="false" />
    <field name="hhd" type="string" indexed="true" stored="false" />
    <field name="battery" type="string" indexed="true" stored="false" />
    <field name="pixel" type="string" indexed="true" stored="false" />

    <field name="_version_" type="long" indexed="true" stored="false"/>
    <field name="_root_" type="string" indexed="true" stored="false" docValues="false" />
    <field name="_text_" type="text_general" indexed="true" stored="false" multiValued="true"/>
这是主要就是对应数据库的列和之前的配置一样
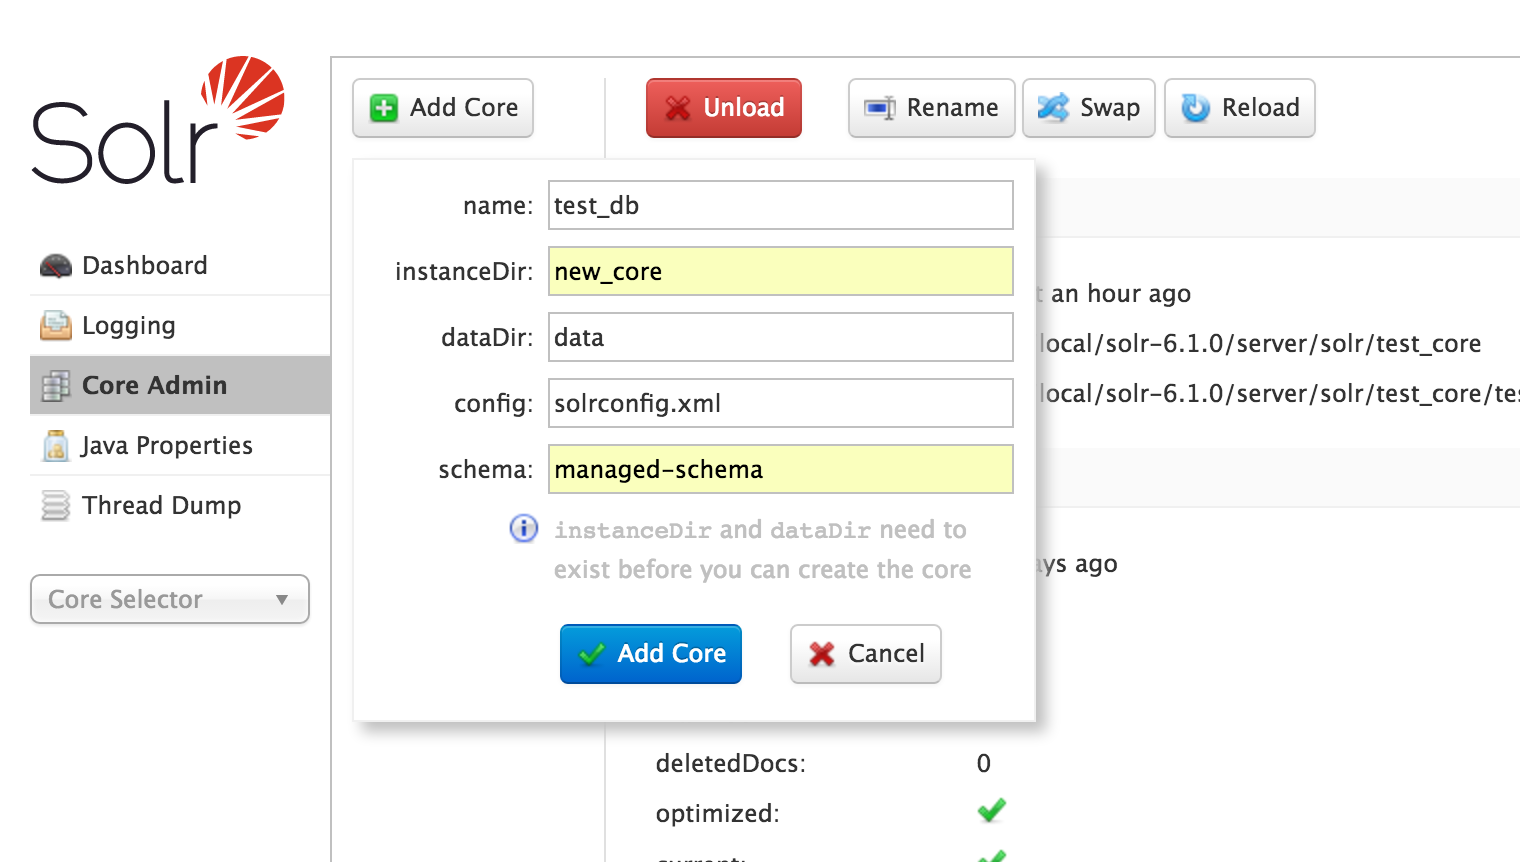
4 、最后在solr web页面上添加我们的 新collection =》 test_db
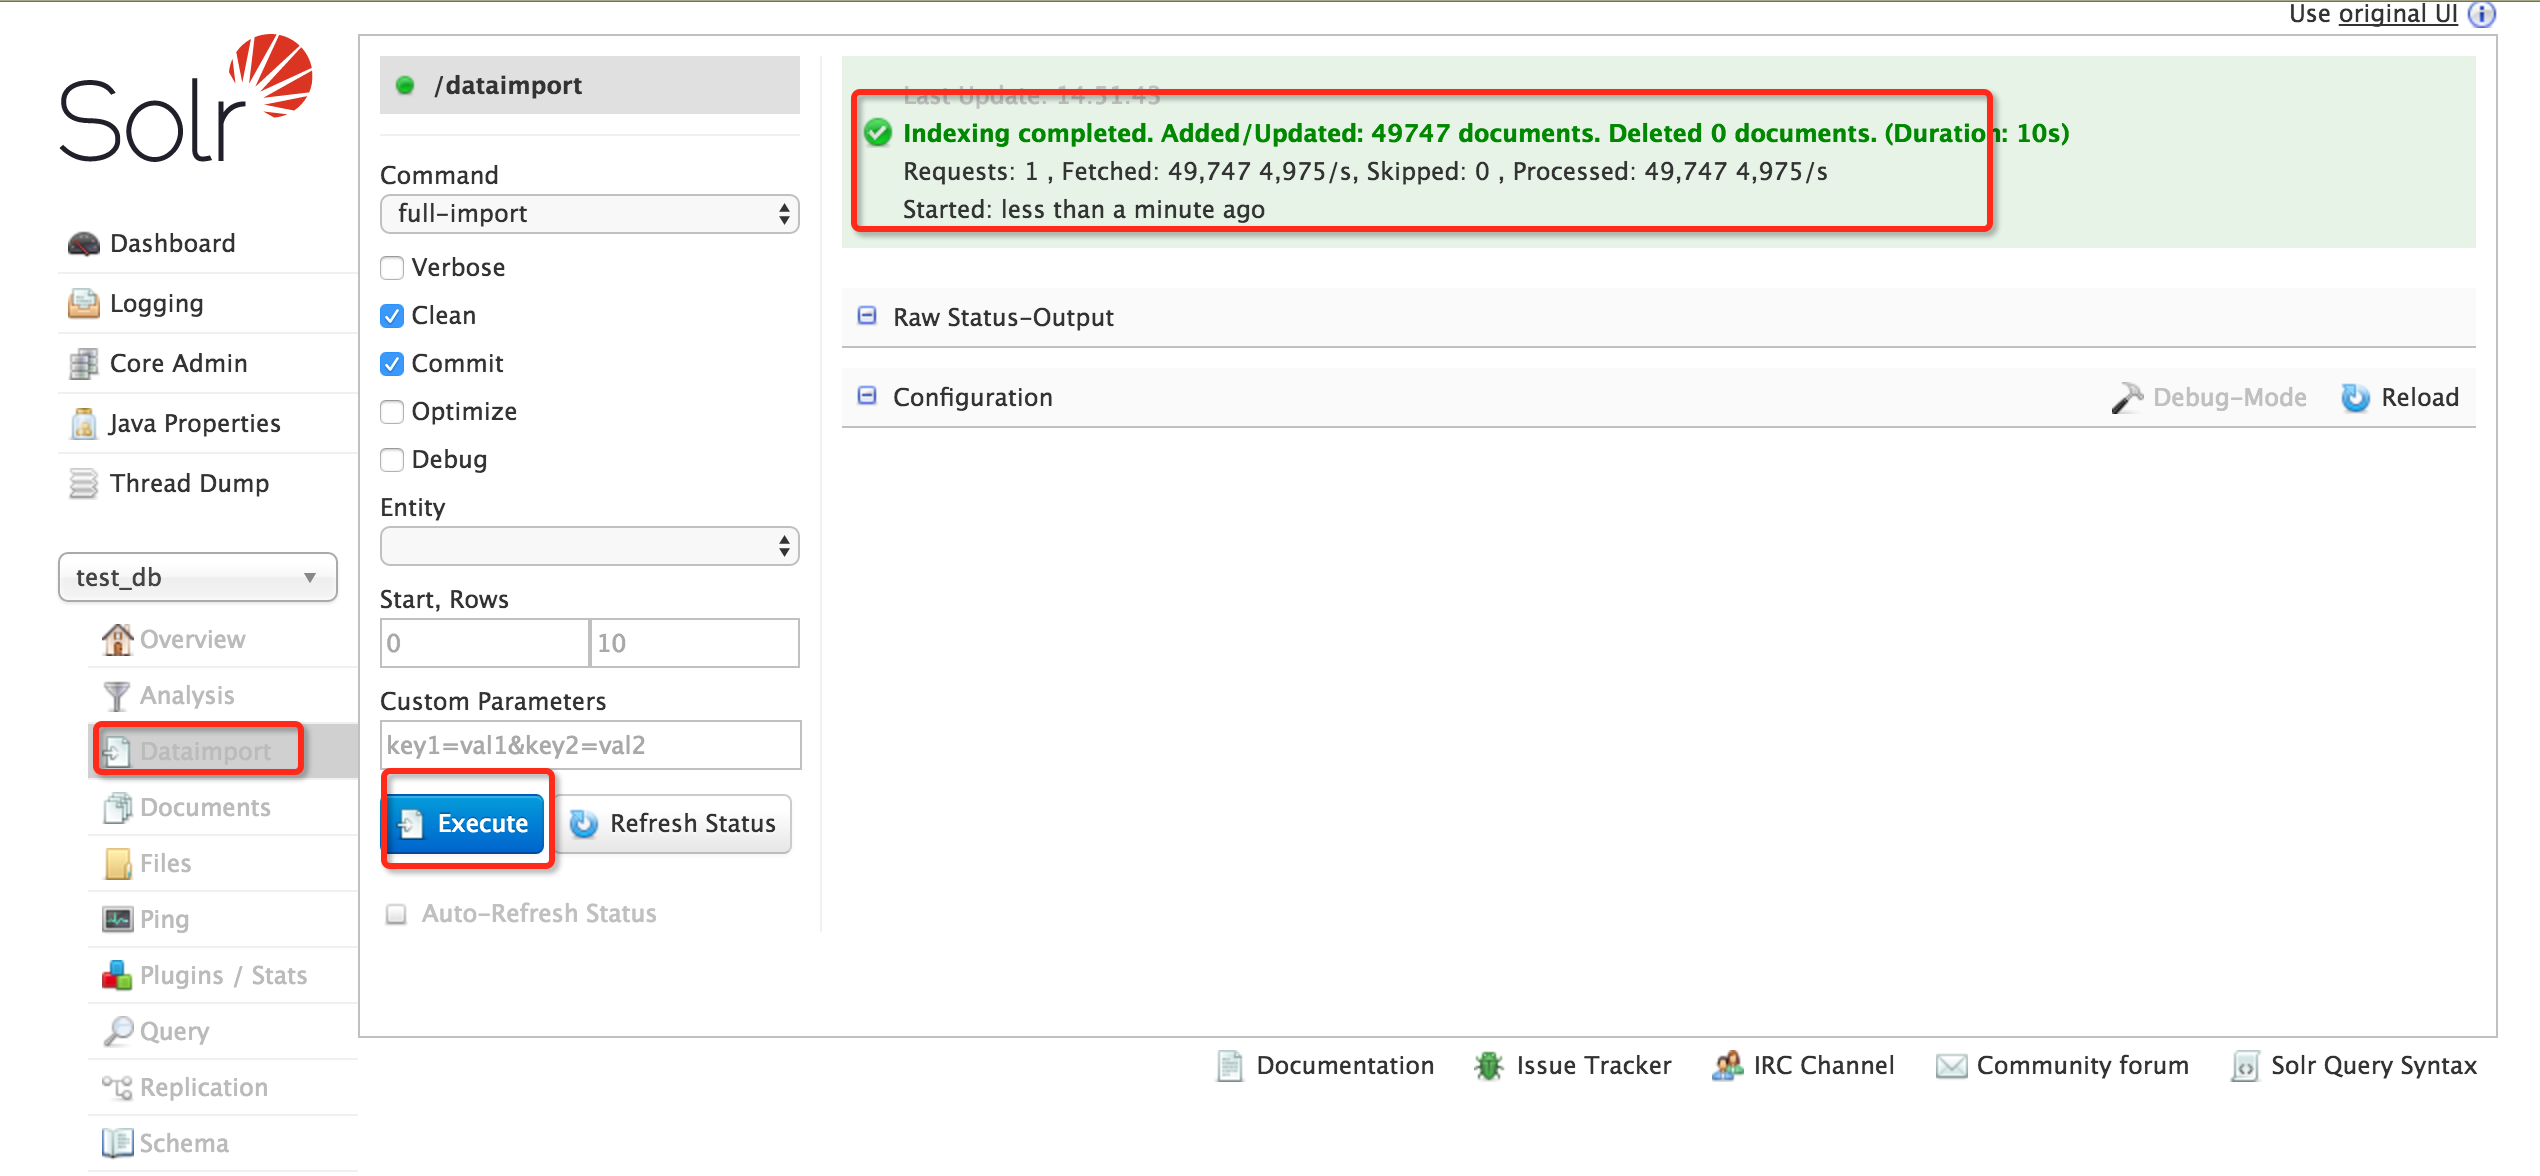
5、导入mysql数据
选择刚建立的 test_db这个 collection 然后 Dataimport,执行 excute
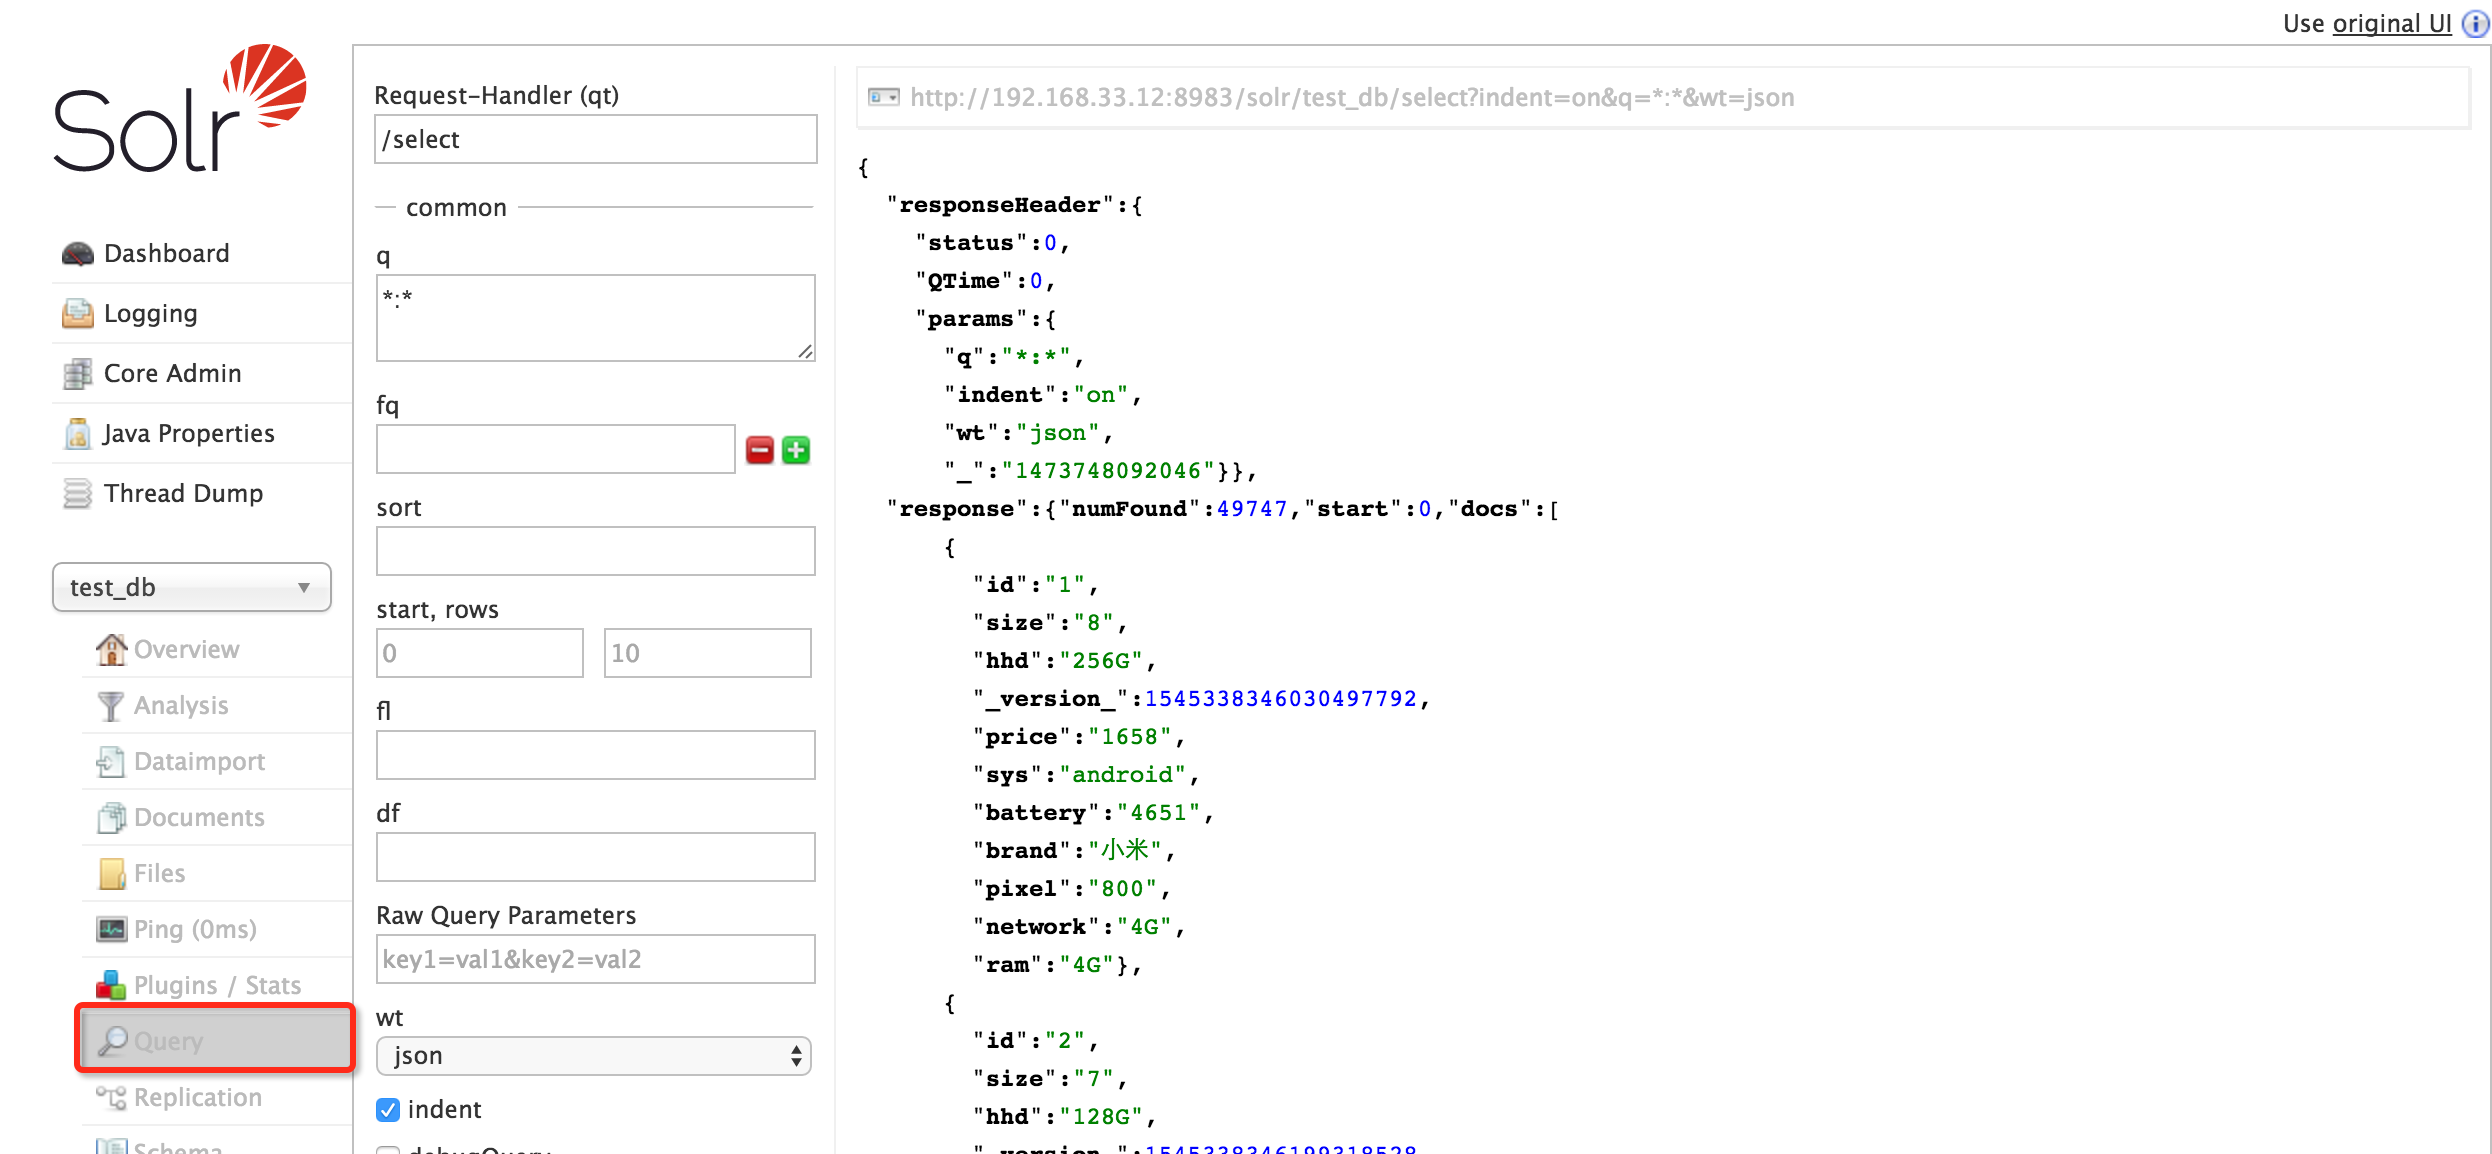
6、正常使用查询mysql数据
选择 query 然后 执行,可以正常使用
参考材料:
http://wiki.apache.org/solr/DataImportHandler#Using_delta-import_command
http://blog.csdn.net/linzhiqiang0316/article/details/51464461